Showing posts with label garage. Show all posts

Friday 28 March 2014

9 N Gauge Model Card Buildings. Pub, Shops and more

I have spent many hours creating, designing and then finally making many of my model buildings from scratch using the very same PDF files I have created for others now to use if they wish. I am up to 9 buildings so far as shown below.

My 9 N Gauge Buildings


See them now on my layout in the pictures below. As you can see I have made more than one of some, in fact you could make a whole village with my one pack of 9 buildings. They are all available in one zip file on Etsy for just £1.99.


Sunday 7 April 2013

1950/60's Garage and Petrol Station N Scale Card Model Plan

 Print and build an N Scale 1/160 card model of a 1950/60's garage and petrol station. The model is based on the Aidensfield Garage in the 'Heartbeat' TV series set in the 60's. The plans are in PDF format and can easily be printed onto A4 thin card or A4 paper which can then be glued to card. The model can be quickly and easily made by just cutting 
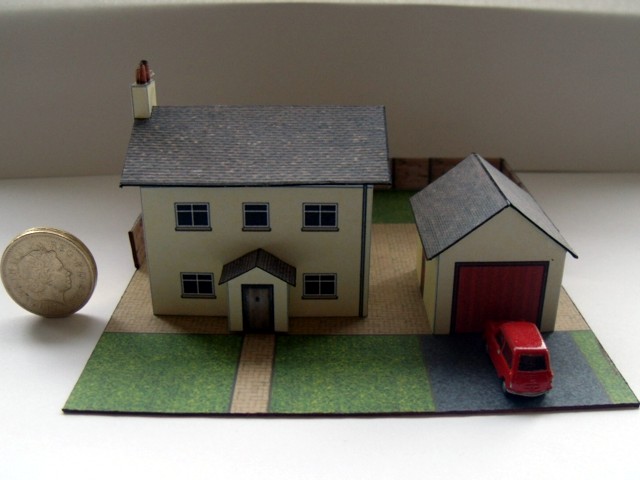
out and gluing the tabs etc. I have included a coin in one shot to give you an idea of the size when finished.


To build this you need the following:

1. A fine sharp craft knife
2. UHU hart adhesive or similar (quick drying)
3. Metal rule

First print out the pdf file plan directly onto A4 thin card or onto A4 paper which you then stick to thin card. Then follow the instructions below. It is probably best to start with the garage so you can get used to the pressure required for cutting through the card and for scoring.

Garage

  1. First cut out the walls piece complete. Score the vertical grey lines for bending, after the whole piece is cut out. If you want the doors in the open position, cut out the door apertures. Cut out the blue wall connector. Carefully bend all the walls along the scored lines and glue the wall connector to the inside of the side wall where they join above the door aperture.
  2. Cut out the inside strengtheners and glue them inside the end walls.
  3. Cut out the front double and side double doors. Cut out the side door and main front door spacers and top fascia boards. Glue both sets of doors in position either open or closed. Use the spacers as a guide to how wide you can have the doors open. The spacers allow the tops of the doors to be covered by the fascia boards. Glue the appropriate spacers above both sets of double doors. Stick the fascia covers over the top of the spacers.
  4. Cut out the roof and then score the lines along the tabs so that they can be bent back double against the main roof. Fold and glue back the two longest sides first followed by the wall end tabs.
  5. Once dry glue the roof to the main walls.
  6. Cut out the chimney stack, score and bend to shape, then glue together and then in place on the roof. Stick the small chimney capping stone to the top. On this instruction sheet you will find a strip of brown. Cut this out and roll between finger and thumb to make the chimney pot. Once rolled nicely, add a touch of glue to the end to fasten. Once dried glue this in place.
  7. Cut out and build the petrol pump, stand and oil tank if required. The two small squares either side of the pump are swinging arms once folded and glued to the top of the pump. I added some black cotton from inside the swinging arms to the sides of the pump, for the petrol pump pipes.
  8. Finally, when dry you can touch up any white areas carefully with a small brush and some water colour paint or some felt tip pens.
Get the model plans for this in my Etsy shop

Tiled Cottage, Garage and Garden

This new N Gauge cottage, garage and garden is in a easy to make print and build format.

To build this you need the following:

1. A fine sharp craft knife
2. UHU hart adhesive or similar (quick drying)
3. Metal rule

First print out the pdf file plan directly onto A4 thin card or onto A4 paper which you then stick to thin card. Then follow the instructions below. It is probably best to start with the garage so you can get used to the pressure required for cutting through the card and for scoring.

Garage

  1. Using the craft knife carefully cut out the garage walls piece. Score the vertical grey lines for bending after the whole piece is cut out. Carefully bend all the walls along the scored lines and glue the tab to the inside of the end wall.
  2. Cut out the inside strengtheners and glue them inside the end walls.
  3. Cut out the roof and then score the lines along the tabs so that they can be bent back double against the main roof. Fold and glue back the two longest sides first followed by the wall end tabs.
  4. Once dry glue the roof to the main walls.

Cottage

  1. First cut out the walls piece complete. Score the vertical grey lines for bending, after the whole piece is cut out. Cut out the end wall strengthener. Carefully bend all the walls along the scored lines and glue the end wall strengthener to the inside of the end wall where they join.
  2. Cut out the inside strengtheners and glue them inside the end walls.
  3. Cut out the roof and then score the lines along the tabs so that they can be bent back double against the main roof. Fold and glue back the two longest sides first followed by the wall end tabs.
  4. Once dry glue the roof to the main walls.
  5. Cut out the chimney after scoring the vertical lines. Bend to shape and glue. Stick this across the join on the end wall and between the cut out in the roof.
  6. Stick the small chimney capping stone to the top. On this instruction sheet you will find a strip of brown. Cut this out and roll between finger and thumb to make the chimney pots. Once rolled nicely, add a touch of glue to the end to fasten. Once dried, cut this in two where marked for the chimney pots. Glue these in place.
  7. Cut and score the porch if required. Glue the white strengthener inside and glue the unit to the front wall. Cut out, bend and add the roof.
  8. Finally, when dry you can touch up any white areas carefully with a small brush and some water colour paint or some felt tip pens.
Get the model plans for this in my Etsy shop

Suffolk Pink Thatched Cottage, Garage and Garden

This latest N Gauge plan for a Suffolk pink thatched cottage, garage and garden is in a simple print and build format.

To build this you need the following:

1. A fine sharp craft knife
2. UHU hart adhesive or similar (quick drying)
3. Metal rule

First print out the pdf file plan directly onto A4 thin card or onto A4 paper which you then stick to thin card. Then follow the instructions below. It is probably best to start with the garage so you can get used to the pressure required for cutting through the card and for scoring.

Garage

  1. Using the craft knife carefully cut out the garage walls piece. Score the vertical grey lines for bending after the whole piece is cut out. Carefully bend all the walls along the scored lines and glue the tab to the inside of the end wall.
  2. Cut out the inside strengtheners and glue them inside the end walls.
  3. Cut out the roof and then score the lines along the tabs so that they can be bent back double against the main roof. Fold and glue back the two longest sides first followed by the wall end tabs.
  4. Once dry glue the roof to the main walls.

Cottage

  1. First cut out the walls piece complete. Score the vertical grey lines for bending, after the whole piece is cut out. Cut out the end wall strengthener. Carefully bend all the walls along the scored lines and glue the end wall strengthener to the inside of the end wall where they join.
  2. Cut out the tall pink strip next to the end wall strengthener and glue this across the join on the end wall, for the chimney
  3. Cut out the inside strengtheners and glue them inside the end walls.
  4. Cut out the roof and then score the lines along the tabs so that they can be bent back double against the main roof. Fold and glue back the two longest sides first followed by the wall end tabs.
  5. Once dry glue the roof to the main walls.
  6. Cut out the chimney stack, score and bend to shape, then glue together and then in place on the roof. Stick the small chimney capping stone to the top. On this instruction sheet you will find a strip of brown. Cut this out and roll between finger and thumb to make the chimney pots. Once rolled nicely, add a touch of glue to the end to fasten. Once dried, cut this in two where marked for the chimney pots. Glue these in place.
  7. Cut and score the porch if required. Glue the white strengthener inside and glue the unit to the front wall. Cut out, bend and add the roof.
  8. Finally, when dry you can touch up any white areas carefully with a small brush and some water colour paint or some felt tip pens.

Get the model plans for this in my Etsy shop