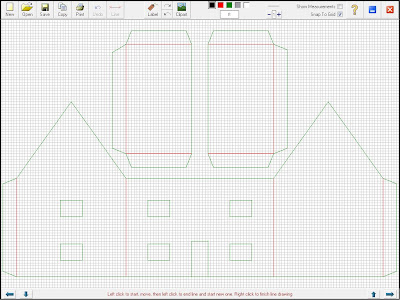
This is the Suffolk Pink Cottage and garage included in my free PC Windows program, N Gauge Model Planner. (Completely free, download below)
Download N Gauge Model Planner for Windows

Instructions for making this are as follows:
Not
recommended for small children without Adult supervision
To build this you need the following:
1. A fine sharp craft knife
2. UHU hart adhesive or similar
(quick drying)
3. Bostik Quick Stick glue stick or
similar
4. Metal rule
Firstly you need to print
the plan and the texture sheet out on A4 paper. Using the glue stick,
fix the wall texture to some thin card (preferable plain on one
side). Lay the wall plan section over this and lightly glue on some
waste areas so that the paper doesn't move while cutting. Cut along
the green lines and lightly score the red ones for bending. Do this
for all the parts of the plan.
After removing the
windows I added some clear plastic to the inside and on top of that
glued the window decoration. Then I glued the walls together using
the end wall inside strengthener. Once dry I added the floor section
inside for added strength. I cut the door texture out a little larger
than the door space on the model and just glued this inside. The
porch is an added option and built the same way.
For the chimney, fold
along the scored lines carefully and fix together. Then glue this to
the main building over the side with the joint running from top to
bottom of the wall. I used the glue stick on the top side of the roof
piece, once cut out. Then I stuck it to the back of the roof texture
so that it was in the centre and also the texture was overlapping on
all sides. I cut around the texture, glued and folded the overlapping
pieces onto the underside of the roof. Once the roof is stuck in
place on the walls I added a small central piece of roof texture to
make the ridge. I finished the chimney with a small card block and
rolled two pieces of paper between my fingers, plus a little glue on
the end for chimney pots. I painted the pots with water colour before
attaching to the chimney stack.
Garage
The garage walls and doors are already printed onto wall
texture, so just cut around the outline after sticking to card. Score
the three vertical lines where the walls need bending and cut out the
front doors and the back window. I then glazed the back window by
gluing a small piece of clear plastic inside across the back. Cut out
the small green block next to the roof texture and cover with wood
plank texture to form a bench. This workbench then glues underneath
the back window and forms support for the two side walls. For the
doors I fixed them to the main walls in the open position after
covering the reverse with the same door covered paper. Make the roof
the same way as for the main cottage.
For both models you can use a little water colour paint
and a fine brush to cover any little errors.
Get this model plan in a pdf download at my Etsy shop


